notas-y-apuntes
GUIs pegajosos
ACLARACIÓN: Como el título indica, esto puede volverse pegajoso. TKinter apesta totalmente - si prefieres pasar a algo más divertido, haz clic en “marcar lección como completa” y pasa al Día 70 para volver a lo bueno.
Es hora de llevar nuestros programas a principios de los 90 mientras aprendemos a crear una Interfaz Gráfica de Usuario (GUI) con una librería de Python llamada tkinter.
tkinter
tkinter es una de las librerías GUI más populares de Python.
👉 Cuando comienzas un proyecto tkinter, obtienes algo de boilerplate, o código de inicio.
import tkinter as tk

window = tk.Tk()
window.title("Hello World") # Sets the name of the window in the border
window.geometry("300x300") # Sets the size of the window in pixels

hello = tk.Label(text = "Hello World") # Creates a text box
hello.pack() # 'pack' places the element on the screen

button = tk.Button(text = "Click me!") # Creates a button
button.pack()

tk.mainloop()
Este código producirá una ventana con el siguiente aspecto

Juega con el tamaño de la ventana para ver el efecto de cambiar las dimensiones.
Trucos de etiquetas
👉 También podemos usar variables para pasar cadenas a las etiquetas como esta:
label = "Hey there world"
hello = tk.Label(text = label)
👉 Ahora voy a usar una subrutina que cambie el texto de la etiqueta cuando haga clic en el botón.
window = tk.Tk()
window.title("Hello World")
window.geometry("300x300")

label = "Hey there world"

def updateLabel():
  label = "Bye world!"
  hello["text"] = label
  # Subroutine that updates the text in the label.

hello = tk.Label(text = label)
hello.pack()

button = tk.Button(text = "Click me!", command = updateLabel) # Calls the updateLabel subroutine when the button is clicked
button.pack()

tk.mainloop()
👉 Intentemos el mismo truco, sólo que esta vez la etiqueta contiene un número que se incrementa con cada click del botón. Para ello necesito usar una variable global de etiqueta.
window = tk.Tk()
window.title("Hello World")
window.geometry("300x300")

label = 0 # Sets the starting label value to 0

def updateLabel():
  global label # Uses the values in the label variable
  label += 1 # Adds one to the value in the label
  hello["text"] = label


hello = tk.Label(text = label)
hello.pack()

button = tk.Button(text = "Click me!", command = updateLabel) # Calls the updateLabel subroutine when the button is clicked
button.pack()

tk.mainloop()
Añadir Texto
Hablemos de Texto Bebé
Podemos añadir cajas de texto a nuestras ventanas usando el comando text totalmente obvio.
👉 Aquí está el código que necesitas aislado:
text = tk.Text(window ,height=1, width = 50)
# Three arguments, name of the window to place the text box in, height & width.
text.pack()
👉 Y aquí está en contexto.
window = tk.Tk()
window.title("Hello World")
window.geometry("300x300")

label = 0

def updateLabel():
  global label
  label += 1
  hello["text"] = label


hello = tk.Label(text = label)
hello.pack()

button = tk.Button(text = "Click me!", command = updateLabel)
button.pack()

text = tk.Text(window ,height=1, width = 50)
text.pack()

tk.mainloop()
Esto nos da una ventana con una caja de texto como esta:

Todo suma
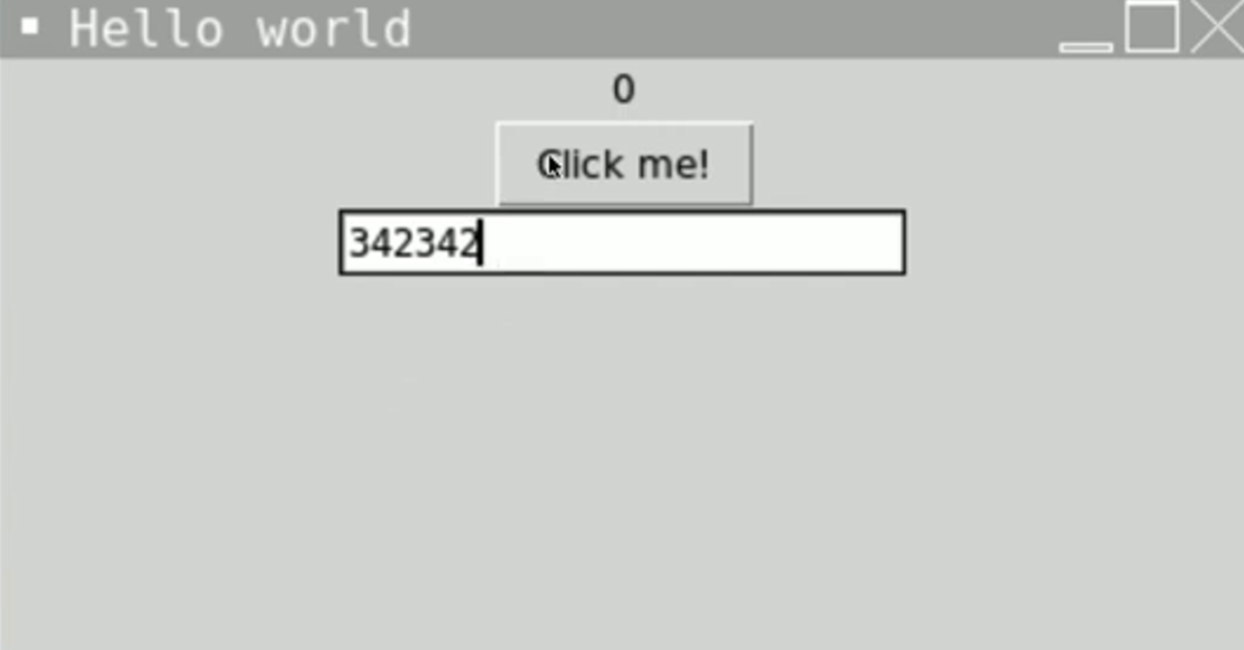
Hagamos que nuestro programa añada el número del cuadro de texto al número de la etiqueta cuando se pulse el botón.
👉 Para ello, tenemos que cambiar la subrutina updateLabel. Aquí está el código aislado:
def updateLabel():
  global label
  number = text.get("1.0","end") # Gets the number from the text box (starting at the first position and going to the end.) and stores in the number variable
  number = int(number) #Casts to an integer. I've done this on a separate line to prevent the line above getting too complex, but you can combine the two.
  label += number # Adds the number from the text box to the one in the label.
  hello["text"] = label
¡Pruébalo!
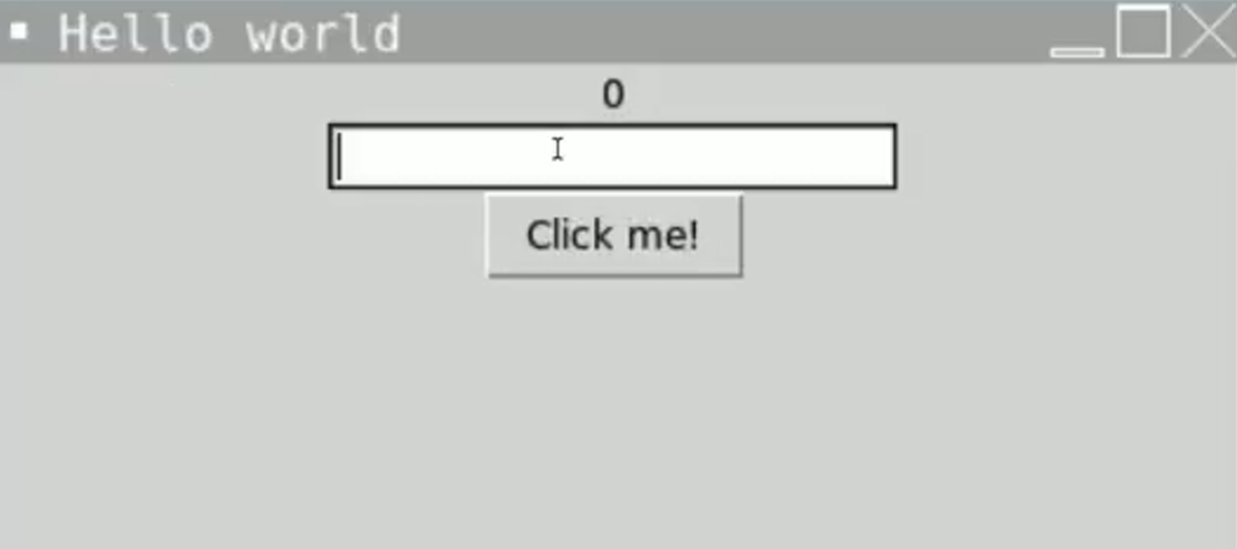
Colocación de artículos
Nuestra ventana tiene un aspecto un poco extraño, ¿verdad? ¿Por qué tener el botón encima de la caja de texto?
👉 Podemos simplemente cambiar el orden definiendo la caja de texto antes del botón en el código:
window = tk.Tk()
window.title("Hola Mundo")
window.geometry("300x300")

etiqueta = 0

 def actualizarEtiqueta():
global label
 número = text.get("1.0", "fin")
número = int(número)
etiqueta += número
 hola["texto"] = etiqueta


hola = tk.Label(texto = etiqueta)
hola.pack()

text = tk.Text(window ,height=1, width = 50)
text.pack

button = tk.Button(text = "¡Hazme clic!", command = updateLabel)
button.pack()

tk.mainloop()
Empaquetar
Podemos añadir argumentos a pack() para controlar la posición de los elementos en la ventana. De nuevo, sólo muestro las líneas de código relevantes en estos ejemplos.
👉 Movamos el botón a la parte inferior de la ventana.
button.pack(side=tk.BOTTOM)
👉 Y la caja de texto a la parte superior a la izquierda de la ventana.
text.pack(side=tk.LEFT)
También puedes usar TOP, RIGHT, CENTER para controlar la ubicación.
Desempaquetando
Si tuviéramos varios botones, por defecto se pondrían uno encima de otro.
button = tk.Button(text = "Click me!",
command = updateLabel)
button.pack()

button = tk.Button(text = "Another Button", command = updateLabel)
button.pack()

button = tk.Button(text = "Last one", command = updateLabel)
button.pack()
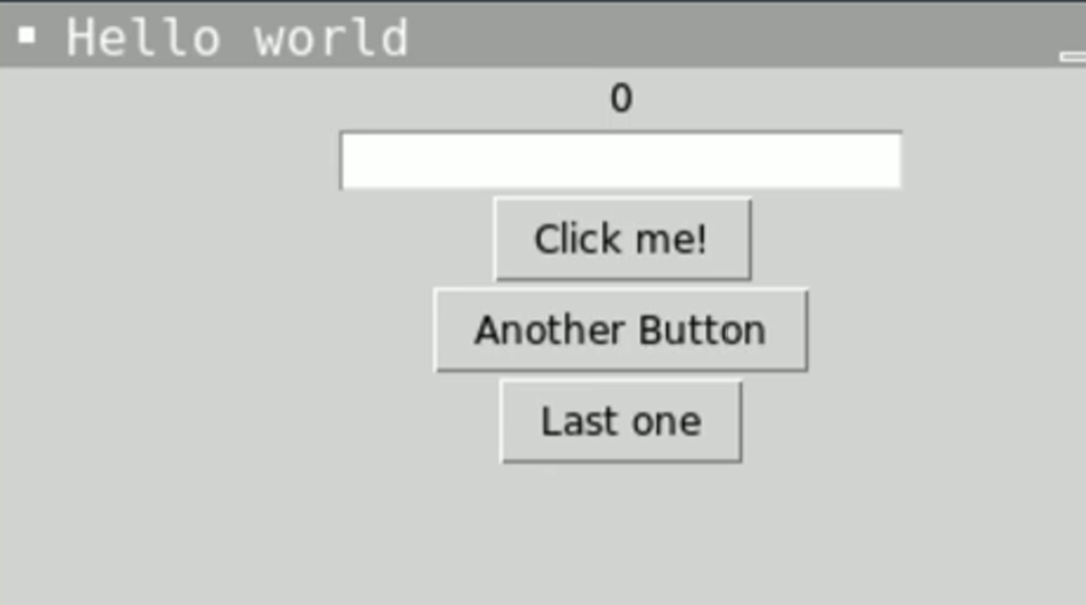
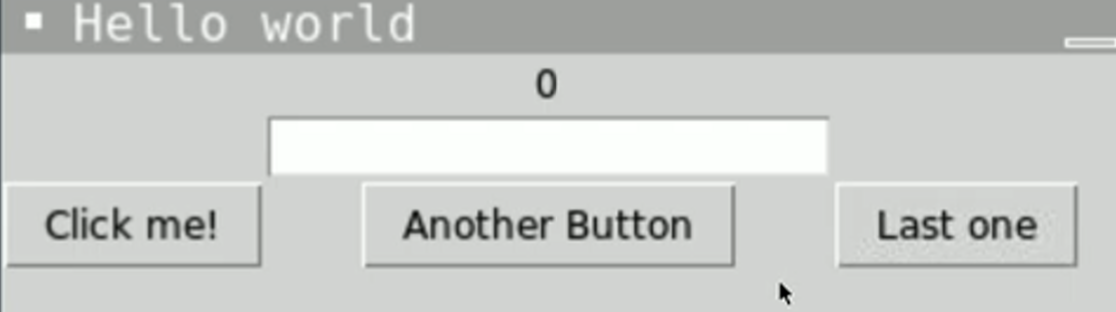
Podemos organizarlos en una cuadrícula más bonita, pero para ello tenemos que eliminar completamente pack y romper toda la ventana en una cuadrícula.
👉 A continuación, utilizamos los números de fila y columna (cero indexado recuerde) para colocar nuestros elementos. Yo he puesto la etiqueta en la fila 0, la caja de texto en la fila 1 y los botones en la fila 2.
window = tk.Tk()
window.title("Hello World")
window.geometry("300x300")

label = 0

def updateLabel():
  global label
  number = text.get("1.0","end")
  number = int(number)
  label += number
  hello["text"] = label


hello = tk.Label(text = label).grid(row=0, column=1)


text = tk.Text(window ,height=1, width = 50).grid(row=1, column=1)


button = tk.Button(text = "Click me!", command = updateLabel).grid(row=2, column=0)

button = tk.Button(text = "Another Button", command = updateLabel).grid(row=2, column=1)

button = tk.Button(text = "Last one", command = updateLabel).grid(row=2, column=2)

tk.mainloop()
Pruébalo
Errores comunes
*Primero, borra cualquier otro código de tu fichero main.py. Copia cada fragmento de código en main.py haciendo clic en el icono de copia en la parte superior derecha de cada cuadro de código. A continuación, pulsa run y comprueba qué errores se producen. Corrige los errores y pulsa “run” de nuevo hasta que estés libre de errores. Pulsa en la 👀 Respuesta para comparar tu código con el correcto.
Error de Atributo
👉 ¿Por qué hay un error de atributo ‘hello.pack()’?
window = tk.Tk()
window.title("Hello World")
window.geometry("300x300")

label = 0

def updateLabel():
  global label
  number = text.get("1.0","end")
  number = int(number)
  label += number
  hello["text"] = label


hello = tk.Label(text = label).grid(row=0, column=1)
hello.pack()

text = tk.Text(window ,height=1, width = 50).grid(row=1, column=1)

button = tk.Button(text = "Click me!", command = updateLabel).grid(row=2, column=0)

button = tk.Button(text = "Another Button", command = updateLabel).grid(row=2, column=1)

button = tk.Button(text = "Last one", command = updateLabel).grid(row=2, column=2)

tk.mainloop()
Otro Error de Atributo
👉 ¿Por qué estoy recibiendo un error de atributo ‘NoneType’ cuando hago clic en un botón? Mi programa funcionaba, pero ahora ya no.
text = tk.Text(window ,height=1, width = 50).grid(row=1, column=1)
👉 Desafío del día 66
Tu reto es crear una sencilla calculadora GUI.
Su programa debe:
- Tener botones para los números del 0 al 9, más, menos, multiplicar, dividir e igual.
- El usuario debe ser capaz de pulsar los botones para crear su cálculo.
- Debe mostrar el resultado correcto cuando se pulsa igual.
Ejemplo:
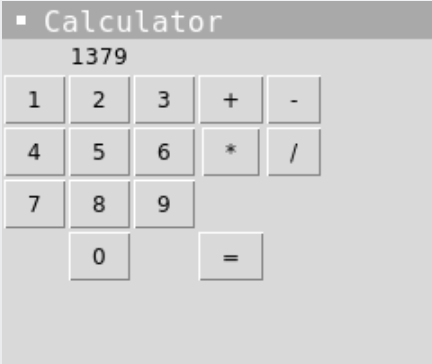
La solucion la encontramos en main.py
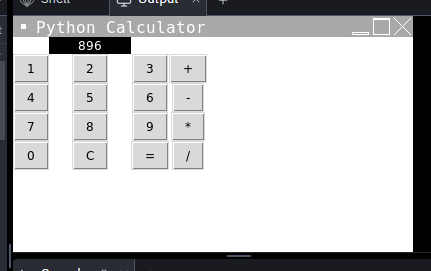
Nota: este es un primer boceto, este codigo puede recibir muchas mejoras. Cuando lo tenga lo pueblico